
kawandi quilting tutorial
Kawandi quilting is a vibrant, improvisational technique rooted in African-Indian cultural fusion. It involves layering fabric scraps and stitching from the outside in, emphasizing creativity and scrap usage.
Definition and Origin
Kawandi quilting is a traditional technique originating from the Siddi community, African descendants in India. The term “Kawandi” translates to “quilt,” representing more than just a piece of fabric—it symbolizes cultural heritage and identity. This unique method was introduced by African immigrants, specifically the Siddis, who brought their quilting traditions to India. Over generations, Kawandi quilting evolved, blending African and Indian influences into a distinctive art form. It is characterized by its improvisational nature, using small fabric scraps and a specific stitching technique that starts from the outside and works inward.
The technique reflects the resilience and creativity of the Siddi people, preserving their history through fabric. Kawandi quilts are not just functional items but also storytelling pieces, carrying deep cultural significance. This art form has gained global recognition, inspiring quilters worldwide to explore its unique approach to fabric layering and stitching.
Overview of the Technique
Kawandi quilting is a unique, improvisational method that involves layering fabric scraps and stitching them together in a distinctive manner. Unlike traditional quilting, it begins from the outside edge and works inward, creating a dynamic, organic design. The technique emphasizes straight-line stitching, with visible threads that add texture and visual interest. Fabric scraps, or “tikeli,” are arranged and sewn onto a backing fabric, often with batting in between for thickness. This approach celebrates creativity and flexibility, allowing quilters to experiment with colors, patterns, and placement freely. The result is a vibrant, one-of-a-kind quilt that tells a story through its eclectic design.
History and Cultural Significance
Kawandi quilting, rooted in the Siddi community’s African-Indian heritage, preserves cultural traditions through vibrant, improvisational designs, blending African and Indian influences into a unique textile art form.
The Siddi Community and Their Heritage
The Siddi community, descendants of African slaves brought to India by Portuguese colonizers, has preserved their cultural identity through traditions like Kawandi quilting. This art form, passed down generations, reflects their resilience and creativity. Siddi quilters use vibrant fabric scraps and unique stitching techniques to create intricate designs. Kawandi quilts are not just functional items but also symbols of their heritage, blending African and Indian influences. The community’s history is woven into every stitch, making each quilt a testament to their enduring cultural legacy and artistic expression.
Kawandi as a Reflection of African-Indian Cultural Fusion
Kawandi quilting embodies the rich cultural fusion of African and Indian traditions. Originating from the Siddi community, it blends vibrant African patterns with Indian stitching techniques. The use of bright colors and improvisational designs reflects the African influence, while the intricate layering and straight-line stitching highlight Indian craftsmanship. This unique fusion creates quilts that are both visually striking and deeply symbolic. Each piece tells a story of cultural exchange and resilience, celebrating the unity of two diverse heritages. Kawandi quilts are not just art but a living testament to the blending of African and Indian identities.
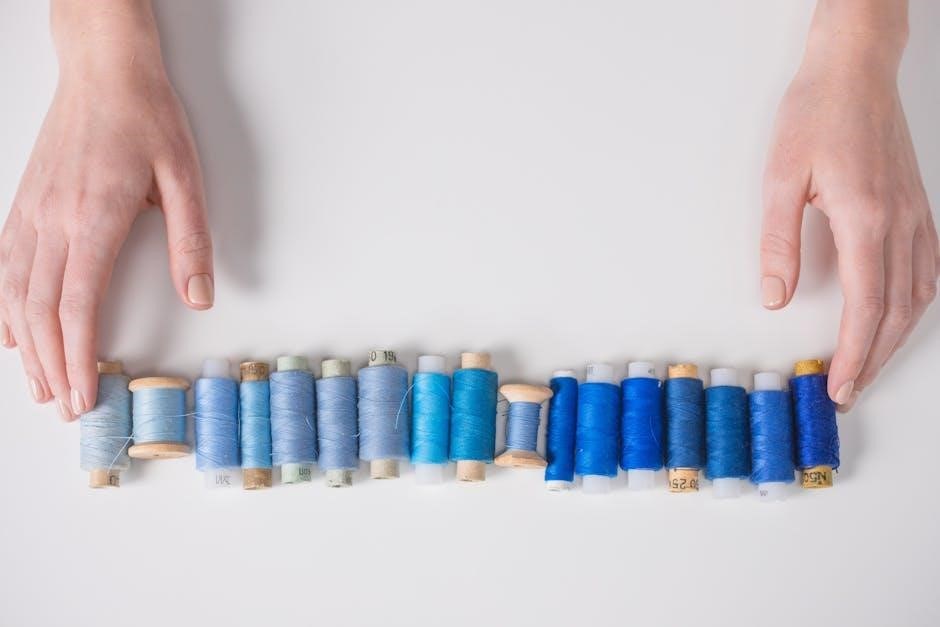
Basic Supplies Needed
Fabric scraps, batting, thread, needles, and backing fabric are essential. Use vibrant scraps for tikeli pieces and sturdy thread for visible stitching to enhance the design.
Fabric Scraps and Batting
Fabric scraps, known as tikeli, are the heart of Kawandi quilting. Use vibrant, small pieces of fabric to create colorful designs. Batting, often made from fabric scraps or thin material, adds thickness. Choose scraps that complement each other in texture and color. The batting layer is placed between the backing fabric and the tikeli pieces. This technique encourages creativity and sustainability by repurposing leftover fabrics. The flexibility in fabric selection allows quilters to experiment with patterns and hues, making each quilt unique. Starting from the outside, the scraps are sewn onto the backing, creating a dynamic, layered design.
Thread and Needles
Choosing the right thread and needles is essential for Kawandi quilting. Use a heavy-duty needle for hand-stitching, as it can handle multiple fabric layers. Opt for contrasting thread colors to make stitches visible, adding a decorative element. Variegated or bold threads enhance the quilt’s aesthetic. A 12wt cotton thread is ideal for its durability and texture. The needle’s size should accommodate the thread without causing fabric distortion. Proper tools ensure smooth stitching and a professional finish, allowing the stitching to become a focal point of the design. This emphasizes the technique’s emphasis on visible, decorative stitching.
Backing Fabric and Other Materials
The backing fabric serves as the foundation of a Kawandi quilt. Use a sturdy, neutral-colored fabric like cotton to provide stability. Scrap fabrics or leftover materials work well for both the backing and batting. Batting can be a layer of fabric scraps, fleece, or even repurposed textiles like scarves. These layers are secured together using pins or temporary stitches. The backing fabric’s size determines the quilt’s dimensions, while the batting adds thickness and warmth. Ensuring the layers are evenly aligned is crucial for a smooth stitching process. This step sets the stage for attaching the colorful tikeli pieces that define the Kawandi style.
Preparing the Backing Fabric and Batting
Layer the backing fabric and batting, securing them with pins or temporary stitches. This step ensures a stable base for attaching the tikeli pieces creatively.
Layering Fabric and Batting
Begin by placing the backing fabric on a flat surface, followed by a layer of batting. This creates a stable foundation for the quilt. Use leftover fabric scraps or repurposed materials like scarves for the batting, ensuring it is evenly spread. The batting adds thickness and warmth to the quilt. Secure the layers with pins or temporary stitches to prevent shifting during the sewing process. This step is crucial for maintaining the quilt’s structure and ensuring even stitching. Proper layering sets the stage for attaching the colorful tikeli pieces creatively.
Securing the Layers
To ensure the fabric and batting stay in place, use pins or temporary hand-stitches. This prevents shifting while sewing. Fold edges under and sew in straight lines, starting from the outside. Use contrasting thread to make stitches visible. Secure each tikeli piece as you go, overlapping edges slightly. This step ensures the quilt remains flat and aligned. Proper securing is key for even stitching and a professional finish. Take care to keep layers smooth, avoiding wrinkles that could distort the design. This method allows for creativity while maintaining structural integrity.
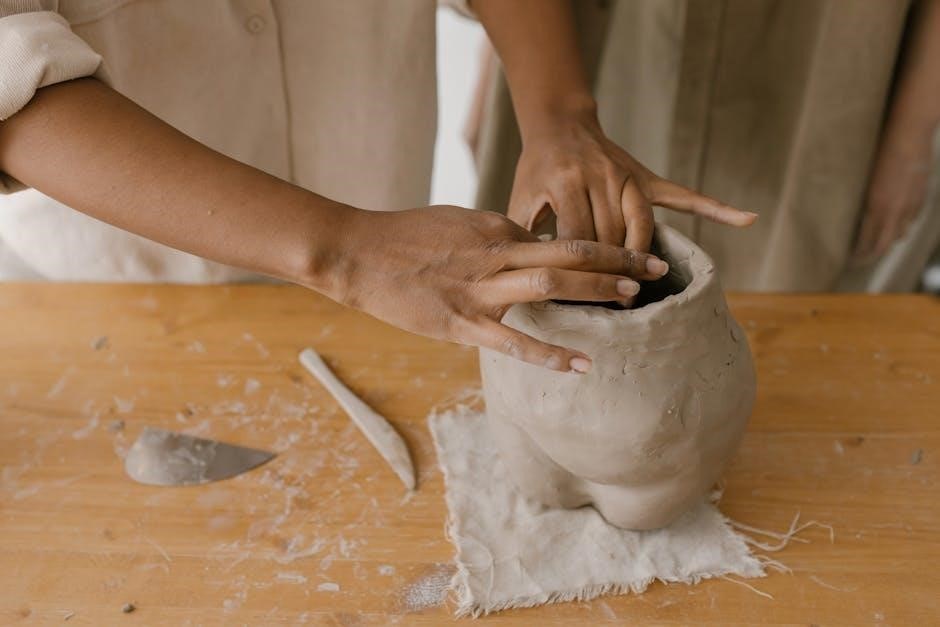
Creating Tikeli Pieces
Tikeli pieces are small fabric scraps cut into squares or rectangles. They are sewn onto the backing fabric using straight stitches, creating a vibrant, improvisational design.
Cutting Fabric Scraps
Cutting fabric scraps is the first step in creating tikeli pieces for Kawandi quilting. Small squares or rectangles are typically used, though sizes can vary. The scraps are cut from leftover fabrics, emphasizing sustainability and creativity. There’s no strict measurement; the size depends on personal preference and the project’s scale. The goal is to have pieces that can be easily sewn onto the backing fabric. The scraps’ vibrant colors and patterns add visual interest, making the quilt eclectic and unique. This step encourages experimentation and resourcefulness, perfect for using up fabric remnants.
Arranging the Tikeli
Arranging the tikeli pieces is a creative process in Kawandi quilting. Small fabric scraps are placed on the backing fabric, often starting from the outside and working inward. The pieces are overlapped slightly as they are sewn, creating a layered, improvisational design. There’s no strict pattern; the arrangement is spontaneous and intuitive. Each tikeli is sewn with straight stitches, following the backing fabric’s edges. This method allows for flexibility and artistic expression, resulting in a vibrant, eclectic quilt. The process encourages experimentation, making each Kawandi quilt truly unique and reflective of the maker’s style.
Attaching Tikeli to Backing
Attaching tikeli involves sewing fabric pieces to the backing, starting from the outside. Fold edges, sew with visible stitches, and overlap pieces for a layered effect.
Starting from the Outside
Kawandi quilting begins by attaching tikeli pieces to the backing fabric, starting from the outer edge. Fold the edges of both the backing and tikeli under to hide raw edges, then sew them together using visible, straight stitches in a contrasting thread. This method ensures a clean finish and allows the stitches to become a decorative element. As you progress, overlap each new tikeli piece slightly with the previous one, folding edges as you go. This outward-in approach creates a seamless, layered design. The process is both meditative and creative, encouraging improvisation while building the quilt’s structure. Phula triangles are often added at the corners for a traditional finish.
Overlapping and Sewing
In Kawandi quilting, overlapping fabric pieces is a key technique. Each new tikeli piece is placed slightly over the previous one, ensuring edges align. Fold the edges under as you sew, using straight, visible stitches in a contrasting thread. This method creates a seamless, layered look. Overlapping allows for spontaneity and creativity, as pieces can be added improvisationally. The process is meditative, with each stitch building the quilt’s texture. By working from the outside in, you gradually fill the center, ensuring a balanced design. This approach minimizes waste and celebrates the beauty of fabric scraps, resulting in a unique, hand-stitched quilt.

Sewing Techniques
Kawandi quilting features straight-line stitching, visible threads, and overlapping fabric edges. Each stitch is deliberate, creating texture. Phula triangles are added at corners for a finished look.
Straight-Line Stitching
Straight-line stitching is a hallmark of Kawandi quilting, where stitches follow the square shape of the backing fabric. This technique differs from traditional quilting, as it starts from the outside and works inward. Each stitch is visible, adding texture and character to the quilt. The process involves sewing in straight lines, securing the layers together without outlining individual fabric pieces. This method creates a unique, improvisational design, allowing quilters to emphasize creativity. The use of contrasting thread colors enhances the stitching, making it a decorative element of the quilt. This approach simplifies the quilting process while producing striking results.
Handling Fabric Edges
In Kawandi quilting, fabric edges are managed by folding and tucking them under as you sew. This technique ensures raw edges are hidden, creating a clean finish. When attaching tikeli pieces, fold the edges of both the backing fabric and the tikeli under before sewing. This method prevents fraying and gives the quilt a polished look. Overlapping fabric pieces slightly allows for seamless integration without precise alignment. The process is forgiving, making it ideal for improvisational work. Properly handling edges is crucial for the quilt’s durability and aesthetic appeal, ensuring a professional finish while maintaining the traditional charm of Kawandi quilting.
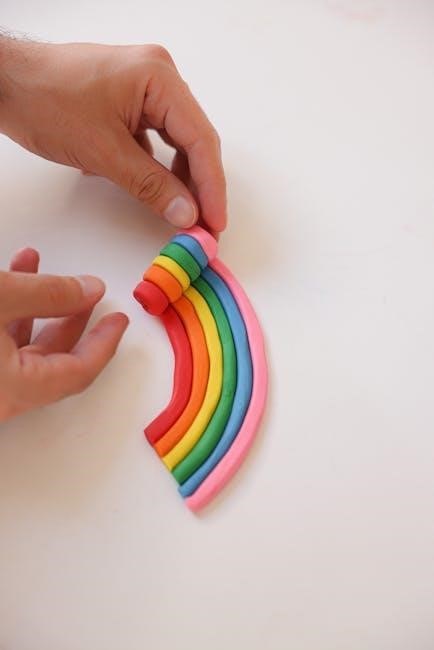
Adding Phula Triangles
Phula triangles are small, decorative elements added to the corners of a Kawandi quilt, symbolizing completion. These triangles serve no practical purpose but are essential for the quilt’s traditional finish. To attach them, cut small triangular shapes from fabric scraps and sew them to the corners using straight stitches. The triangles are typically brightly colored to stand out. They are sewn in place with visible stitches, adding a pop of color and texture. Phula triangles are a distinctive feature of Kawandi quilting, reflecting its African-Indian cultural heritage and adding a playful, finishing touch to the design.

Tips for Success
Embrace improvisation, use fabric scraps creatively, and balance colors. Start from the outside, ensuring pieces align. Add phula triangles for a traditional finish and visible stitching for charm.
Improvisational Approach
Kawandi quilting thrives on spontaneity, encouraging quilters to embrace an unplanned, creative process. Unlike traditional quilting, which often follows precise patterns, Kawandi allows for flexibility and experimentation. This method involves adding fabric pieces as you go, without a predetermined design. The technique fosters a sense of freedom, making it ideal for using leftover fabric scraps. By allowing the quilt to evolve organically, quilters can discover unique patterns and color combinations that reflect their personal style. This approach not only reduces waste but also makes the craft accessible and enjoyable for all skill levels.
Using Fabric Scraps Effectively
Kawandi quilting is an excellent way to repurpose fabric scraps, transforming them into vibrant, unique designs. Small pieces of fabric, known as tikeli, are sewn onto the backing fabric in a spontaneous manner. This technique encourages creativity and reduces waste by utilizing even the tiniest remnants of fabric. The process involves arranging and overlapping scraps in a way that creates a cohesive yet improvisational design. By focusing on scrap usage, Kawandi quilting not only promotes sustainability but also adds a personal touch to each quilt, making it a meaningful and eco-friendly craft.
Balancing Colors and Patterns
Balancing colors and patterns in Kawandi quilting is key to creating a visually appealing design. While the technique encourages improvisation, thoughtful placement of fabrics ensures harmony. Bold, vibrant scraps can be strategically positioned to draw the eye, while neutral tones help balance the composition. Mixing patterns like stripes, florals, and solids adds depth, but aligning them with the stitching lines can create a cohesive look. This balance of contrast and unity allows the quilt to feel dynamic yet harmonious, reflecting the cultural fusion and creativity inherent in Kawandi quilting.
Advanced Techniques
Advanced Kawandi techniques include machine stitching for efficiency, incorporating embroidery for intricate details, and creating layered designs for added complexity and visual interest in quilts.
Machine Stitching
Machine stitching offers a modern twist on traditional Kawandi quilting, allowing for faster creation while maintaining the technique’s unique aesthetic. It enables quilters to achieve straight-line stitching efficiently, blending contemporary tools with heritage methods. This approach is particularly useful for larger projects or those seeking a more streamlined process. By adapting machine stitching, crafters can still emphasize vibrant fabric scraps and improvisational designs, keeping the essence of Kawandi intact while exploring new creative possibilities.
Incorporating Embroidery
Embroidery adds a decorative touch to Kawandi quilts, enhancing their visual appeal. It can be used to outline tikeli pieces, create intricate patterns, or add personalized details. Many quilters incorporate embroidery to secure layers or highlight specific fabric scraps. This technique blends seamlessly with the improvisational nature of Kawandi, allowing for unique designs. Embroidery can also be used to add phula triangles, a traditional element of Kawandi quilts, making them stand out. By combining embroidery with straight-line stitching, crafters can achieve a harmonious balance between texture and simplicity, giving each quilt a distinctive character.
Creating Layered Designs
Creating layered designs in Kawandi quilting involves building up fabric pieces gradually. Start by sewing tikeli pieces from the outside edge, overlapping them as you work inward. This technique allows for a dynamic, layered appearance. Each layer is secured with straight-line stitching, blending seamlessly into the next. The process encourages creativity, as quilters can experiment with fabric placement and color combinations. Layered designs add depth and texture, making each quilt unique. This method reflects the improvisational spirit of Kawandi, where the design evolves organically during the stitching process, resulting in a visually striking and intricate final piece.
Case Studies and Examples
Explore finished Kawandi quilt projects for inspiration. Step-by-step tutorials and examples showcase traditional techniques, offering practical insights into creating vibrant, layered designs.
Finished Kawandi Quilt Projects
Finished Kawandi quilts showcase vibrant, layered designs, often featuring small fabric scraps arranged improvisationally. These projects highlight the technique’s creativity, with phula triangles adding a decorative touch. Many crafters share their completed quilts online, inspiring others with their unique interpretations. Each quilt reflects the maker’s personal style, blending colors and patterns in dynamic ways. Finished projects demonstrate how Kawandi quilting transforms scraps into stunning works of art, preserving the cultural heritage of the Siddi community while encouraging modern creativity. These examples serve as motivation for beginners and seasoned quilters alike to explore this distinctive craft.
Step-by-Step Tutorial for a Simple Kawandi Quilt
Start by gathering fabric scraps, batting, and backing fabric. Layer the backing and batting, then begin stitching from the outside edge. Fold fabric scraps into tikeli pieces, sewing them onto the backing with straight, visible stitches. Overlap pieces as you work inward, ensuring edges align. Use bright threads to enhance the stitching. Once the center is reached, add decorative phula triangles at the corners. Finish by trimming excess fabric and admiring your unique, improvisational quilt. This method celebrates creativity and scrap usage, making each project a one-of-a-kind piece reflecting the maker’s style.

Community and Resources
Join local quilt guilds, online forums, and workshops to connect with Kawandi enthusiasts. Explore tutorials on YouTube and exclusive patterns on Ko-Fi for inspiration and guidance.
Quilting Guilds and Workshops
Quilting guilds and workshops are excellent resources for learning Kawandi techniques. Many guilds, like the Calico Cut-Ups Quilt Guild, host sessions with fiber artists and quilters who specialize in Kawandi. These events provide hands-on training, allowing participants to explore traditional methods and improvisational approaches. Workshops often emphasize scrap usage and creative stitching, making them ideal for crafters of all skill levels. Instructors like Dee Christopher and Jen Strauser offer step-by-step guidance, helping attendees master the unique process of layering and stitching from the outside in. These community-driven spaces foster creativity and connection among Kawandi enthusiasts.
Online Communities and Forums
Online communities and forums are invaluable for Kawandi quilters, offering tutorials, inspiration, and support. Platforms like Pinterest and YouTube feature step-by-step guides and creative ideas. Quilters like Jen Strauser and Dee Christopher share their expertise through online courses and tutorials. Forums and social media groups connect enthusiasts worldwide, fostering collaboration and knowledge sharing. These digital spaces provide access to resources, tips, and motivation, making them essential for both beginners and experienced quilters. Engaging with these communities enhances the learning process and inspires new projects, keeping the Kawandi tradition alive and thriving globally.
Recommended Reading and Tutorials
For those eager to dive into Kawandi quilting, numerous resources are available. Blogs like dearliza.blog and websites such as Improv Fiber Arts offer detailed tutorials and insights. YouTube channels feature step-by-step guides, with instructors like Jen Strauser and Dee Christopher sharing their expertise. Online courses provide structured learning, while social media platforms like Pinterest and Instagram showcase inspiring projects. Books and eBooks on African-Indian textile traditions also offer historical context and creative ideas. These resources cater to all skill levels, making it easy to learn and master the Kawandi technique from the comfort of home.