
caterpillar to butterfly kit instructions
Welcome to the fascinating world of butterfly kits! These educational tools provide a hands-on experience, allowing you to witness the magical transformation from caterpillar to winged beauty. Perfect for STEM learning, these kits include habitats, feeders, and guides, making it easy to observe and care for the entire life cycle of butterflies. With step-by-step instructions, you’ll be guided through the process, ensuring a successful and educational journey. Prepare to be amazed as you watch nature unfold before your eyes!
1.1 What is a Caterpillar to Butterfly Kit?
A Caterpillar to Butterfly Kit is an educational tool designed to allow individuals to observe and participate in the life cycle of butterflies. These kits typically include a habitat, such as a mesh enclosure, a feeding solution, and caterpillars. They often come with instructional guides, stickers, and educational materials to enhance the learning experience. The kit provides everything needed to care for the caterpillars, watch them form chrysalises, and eventually emerge as butterflies. It’s a hands-on way to learn about metamorphosis and the life cycle of these fascinating insects. The kits are popular for STEM education and are suitable for both children and adults, offering a magical and educational experience.
1.2 Benefits of Using a Butterfly Kit
Using a Butterfly Kit offers numerous educational and emotional benefits. It provides a hands-on learning experience, allowing users to observe the fascinating life cycle of butterflies up close. These kits are ideal for teaching STEM concepts, sparking curiosity, and fostering a connection with nature; They are also a great way to encourage responsibility and patience, especially for children, as they care for the caterpillars and await their transformation. Additionally, the kits promote a sense of accomplishment and wonder as users witness the magical metamorphosis. They are suitable for both children and adults, making them a versatile and engaging educational tool for families, classrooms, or individual learners.
1.3 What to Expect from the Process
When using a caterpillar-to-butterfly kit, expect a fascinating journey through the butterfly life cycle. The process typically takes about three weeks, during which you’ll witness the caterpillar’s growth, chrysalis formation, and the emergence of a beautiful butterfly. The kit provides a safe and controlled environment for these transformations, allowing you to observe each stage up close. You’ll need to care for the caterpillars, monitor their development, and prepare for the chrysalis stage. Once the butterfly emerges, it will need time to strengthen its wings before flying. This hands-on experience is both educational and rewarding, offering insights into nature’s wonders and the importance of patience and responsibility.
Setting Up the Habitat
Place the caterpillar cup in a quiet, undisturbed area with room temperature, away from direct sunlight and heating vents. Use the provided mesh habitat for proper ventilation and observation.
2.1 Choosing the Right Location for the Habitat
Choosing the right location for your butterfly habitat is crucial for the caterpillars’ growth and transformation. Place the habitat in a quiet, undisturbed area to minimize stress on the caterpillars. Ensure the location is at room temperature, avoiding direct sunlight, heating vents, or air conditioners, as extreme temperatures can harm the caterpillars. Keep the habitat away from chemicals or sprays to maintain a safe environment. Position it on a stable surface, such as a table or shelf, where it won’t be accidentally moved. Ideally, place it near a window for observation but ensure it’s not exposed to direct sunlight. This setup will provide optimal conditions for the caterpillars to thrive and transform into beautiful butterflies.
2.2 Assembling the Butterfly Habitat
Assembling the butterfly habitat is an essential step to create a safe and nurturing environment for your caterpillars. Start by unpacking the mesh butterfly cage and flower-shaped feeder from the kit. Place the small plastic feeding dish and sponge in the center of the flower-shaped dish at the bottom of the habitat. This setup provides a feeding area for the butterflies once they emerge. Use the flower-petal stickers included in the kit to decorate the feeder, making it visually appealing. Gently attach the flower-shaped feeder to the habitat according to the instructions. Ensure all parts are securely fitted to prevent any leaks or instability. Once assembled, place the habitat in a suitable location, away from direct sunlight and drafts, to promote healthy growth and transformation.
2.3 Preparing the Feeding Solution
Preparing the feeding solution is a simple yet crucial step in caring for your butterflies. The kit typically includes a flower-shaped feeder and a small plastic specimen dish. Start by following the instructions to mix the feeding solution, ensuring it’s the right consistency and composition for the butterflies. Soak the provided sponge in the solution and place it in the center of the flower-shaped dish. This setup allows the butterflies to feed easily once they emerge. Decorate the feeder with the included flower-petal stickers to make it visually appealing. Place the feeder securely in the habitat, ensuring it’s accessible and stable. This step ensures your butterflies have a steady food source, promoting their health and vitality during their emergence.
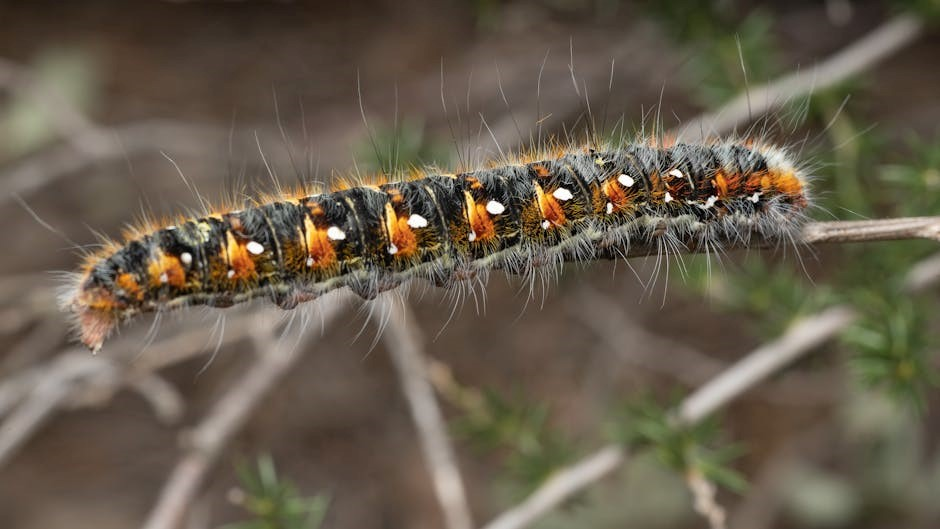
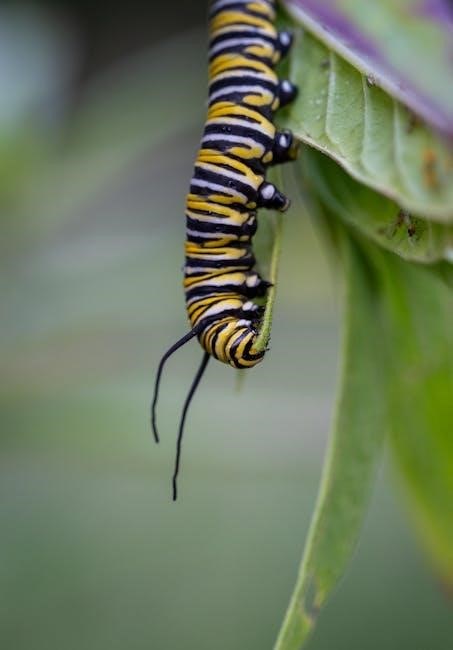
Caring for Caterpillars
Place caterpillars in a quiet, undisturbed area away from direct sunlight and heating vents. Ensure the environment remains clean and stable, avoiding chemical sprays to promote healthy growth.
3.1 Placing Caterpillars in the Habitat
Gently transfer the caterpillars to their habitat, ensuring they are placed in a secure, undisturbed area. Position the caterpillar cup in a quiet, stable location away from direct sunlight, heating vents, and air conditioners. Room temperature is ideal for their growth; Avoid opening the cup excessively, as this can disrupt their environment. Handle the caterpillars carefully to prevent stressing them. Once placed, monitor their activity and ensure the habitat remains clean. The mesh enclosure provides proper airflow, promoting healthy development. Keep the area free from chemicals to safeguard their well-being. This setup creates an optimal environment for the caterpillars to thrive and begin their transformation.
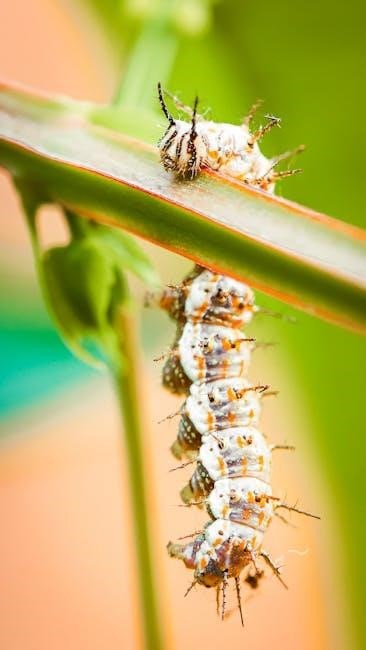
3.2 Monitoring Caterpillar Growth
Observe your caterpillars daily to track their growth and ensure they are thriving. Note changes in size, color, and appetite, as these indicate healthy development. Ensure the caterpillars are eating the provided food source, as proper nutrition is crucial for their transformation. Keep the habitat clean by removing any uneaten food or waste. Avoid disturbing the caterpillars excessively, as this can cause stress; Place the habitat in a quiet, stable location away from direct sunlight and drafts. Monitor for signs of molting, as caterpillars shed their skin several times as they grow. Expect the caterpillar stage to last about 10-14 days before they attach themselves to form a chrysalis. Regular observation helps ensure a successful transition to the next stage.
3.3 Maintaining the Caterpillar Environment
Maintaining a stable and clean environment is crucial for caterpillar health. Keep the habitat away from direct sunlight, drafts, and extreme temperatures. Ensure the cup or enclosure remains at room temperature, ideally between 65-75°F, to promote healthy growth. Avoid using chemical sprays or cleaners near the habitat, as they can harm the caterpillars. Gently remove any uneaten food or waste to prevent mold and maintain freshness. Humidity levels should be moderate, as excessive moisture can lead to mold growth. Ensure the habitat is secure and undisturbed, allowing the caterpillars to focus on eating and growing. Regularly inspect the enclosure for cleanliness and proper conditions to support the caterpillars’ development into healthy chrysalises.
Observing the Chrysalis
Observing the chrysalis is a fascinating stage. Place it in a dark, quiet spot, away from direct sunlight. Use a netted environment for proper emergence. This ensures a safe transformation.
4.1 Identifying the Chrysalis Formation
Identifying the chrysalis formation is a crucial step in the butterfly life cycle. The caterpillar will attach itself to a surface and form a chrysalis, typically within 1-2 weeks. The chrysalis appears as a hard, protective casing, often green or brown, blending with its surroundings. Ensure the habitat is secure and the chrysalis is properly attached to prevent it from falling. Keep the environment quiet and dark, as direct sunlight can hinder development. Avoid excessive handling, as this may damage the delicate structure. Monitor the chrysalis daily for signs of emergence, such as slight movement or color changes. Patience is key, as this stage usually lasts 7-10 days.
4.2 Handling the Chrysalis Gently
Handling the chrysalis requires extreme care to avoid damaging the delicate transformation process. Gently inspect the chrysalis to ensure it is securely attached to the habitat. Avoid touching or moving the chrysalis excessively, as this can disrupt the butterfly’s development. If the chrysalis becomes dislodged, carefully reattach it using a small amount of gentle adhesive or a safe, non-toxic material. Keep the environment stable, avoiding sudden movements or vibrations. Maintain a clean, dry habitat to prevent mold or moisture issues. Handle the chrysalis only when necessary, and always with clean hands to minimize contamination. Proper care ensures the butterfly emerges healthy and strong.
4.3 Positioning the Chrysalis for Emergence
Positioning the chrysalis correctly is crucial for a successful emergence. Place the chrysalis in a secure, upright position within the habitat, ensuring it is firmly attached to a surface. Avoid direct sunlight, as it can cause overheating. Use the netted environment provided in the kit to allow proper airflow and visibility. Gently attach the chrysalis to the lid or a designated area using a small amount of non-toxic adhesive if necessary. Keep the habitat stable and avoid moving it excessively to prevent dislodging the chrysalis. Maintain a clean, dry environment to prevent mold growth. Proper positioning ensures the butterfly emerges without obstruction, allowing its wings to expand and dry fully before flying.
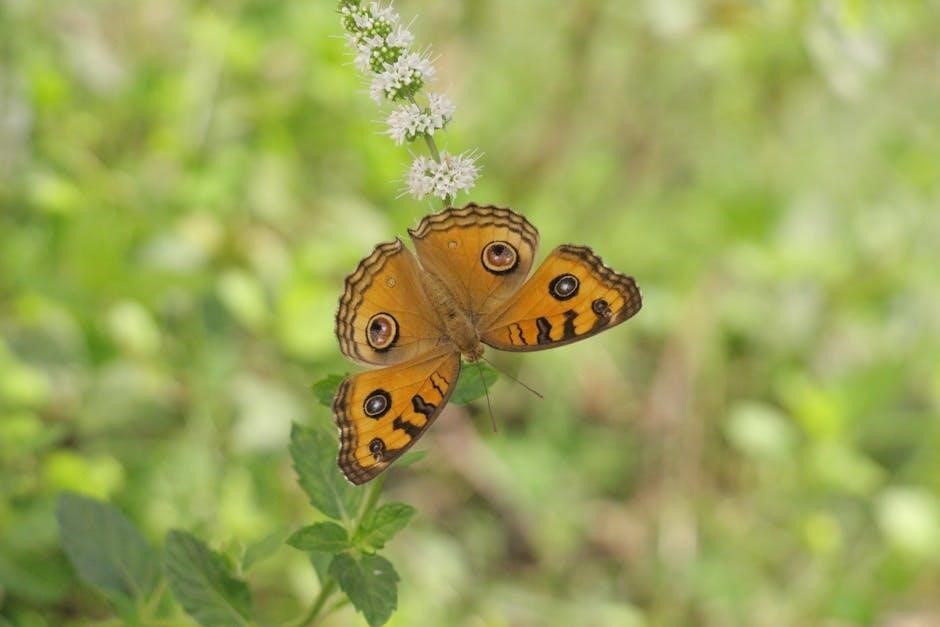
Handling Butterfly Emergence
Observe the emergence process closely, ensuring the habitat remains stable and undisturbed. Keep the environment calm and quiet to allow the butterfly to safely unfold its wings.
5.1 Understanding the Emergence Process
The emergence process is a critical phase where the butterfly exits its chrysalis. It typically occurs after 2-4 weeks, depending on species and environmental conditions. During this time, the butterfly will slowly emerge, its wings still soft and folded. It is essential to avoid disturbing the habitat to prevent damage to the delicate wings. The butterfly will pump fluid through its wings, expanding them to their full size. This process can take several hours, after which the wings will harden, allowing the butterfly to fly. Observing this transformation is a magical experience, offering insights into nature’s remarkable processes.
5.2 Caring for Newly Emerged Butterflies
Caring for newly emerged butterflies involves providing a safe and nurturing environment. Ensure the habitat is draft-free and maintained at room temperature. Offer a feeding solution, such as sugar water or fruit, using the flower-shaped feeder included in most kits. Place a damp sponge nearby to provide hydration. Avoid handling the butterflies excessively, as their wings are fragile. Gently move them to the feeding area if necessary. Keep the habitat clean by removing any uneaten food. Observe and enjoy this magical stage, as the butterflies will begin flying and sipping nectar within hours. This care routine supports their transition to independence before release.
5.3 Feeding the Butterflies
Feeding newly emerged butterflies is essential for their survival and energy. Use the flower-shaped feeder included in most kits to provide a sugar-water solution, mixed according to the instructions. Place the feeder in the habitat, ensuring it’s accessible. Add a damp sponge nearby for hydration. Butterflies are attracted to sweet liquids, so fresh fruit like oranges or bananas can also be offered. Avoid placing the feeder in direct sunlight to prevent spoilage. Keep the feeding area clean to maintain the health of the butterflies. This step ensures they are well-nourished before their release, allowing them to thrive during their short but vibrant adult stage.
Releasing the Butterflies
Releasing butterflies is a magical moment, allowing them to fly freely in their natural habitat. Choose a calm, sunny day and a safe, flower-rich location for their release.
6.1 Preparing for Release
Preparing for the release of your butterflies is an exciting step. Ensure the butterflies are fully emerged and active, with dry wings. Choose a calm, sunny day with no strong winds or rain. Select a safe, open area with flowers for nectar. Avoid releasing near roads or predators. Gently remove the butterflies from their habitat, taking care not to harm their delicate wings. Release them one by one, allowing them to fly naturally. This moment is a rewarding conclusion to your care journey, giving the butterflies a chance to thrive in their natural environment.
6.2 Choosing the Right Release Location
Selecting the right location for releasing your butterflies is crucial for their survival. Opt for a safe, open area with abundant flowers, as nectar is essential for their energy. Avoid releasing near roads, predators, or areas with pesticides. Choose a spot with natural shelter, such as trees or bushes, to protect them from strong winds and predators. Ensure the area is free from direct sunlight to prevent overheating. Release the butterflies near native plants that attract pollinators, as this increases their chances of thriving. Avoid releasing in confined or urban spaces, as this can hinder their ability to fly and find food. A natural, serene environment is ideal for their successful integration into the wild.
6.3 Timing the Release
Timing the release of your butterflies is essential for their success. Release them in the morning when temperatures are mild, ensuring they have ample daylight to fly and find food. Avoid releasing during rain, strong winds, or extreme heat, as these conditions can be harmful. Wait until the butterflies are fully dry and able to fly strongly, as this increases their survival chances. Release them near flowers to provide an immediate nectar source. Avoid releasing at dusk or in the evening, as butterflies need daylight to navigate. Releasing them in sync with natural daylight hours ensures they can adapt and thrive in their new environment.
Troubleshooting Common Issues
Address dead caterpillars by removing them promptly. Handle chrysalis gently to avoid damage. Monitor butterfly health, ensuring proper feeding and a clean environment for optimal survival and well-being.
7.1 Dealing with Dead Caterpillars
If you notice dead caterpillars in your habitat, it’s important to remove them immediately to prevent decay and contamination. Use gloves or a clean tool to gently take out the deceased caterpillars and dispose of them properly. Clean the habitat thoroughly with a mild soap solution to eliminate any bacteria or fungi that may have developed. Ensure the remaining caterpillars have fresh food and a clean environment to promote healthy growth. Monitoring the health of your caterpillars daily can help you address issues early and maintain a thriving habitat for successful metamorphosis.
7.2 Addressing Chrysalis Problems
If you notice issues with the chrysalis, such as discoloration or mold, it’s crucial to act quickly. Gently remove any affected chrysalises to prevent contamination. Ensure the habitat is clean and well-ventilated, as moisture can exacerbate mold growth. If a chrysalis becomes detached, carefully reattach it using a small amount of glue or tape, ensuring it’s secure. Avoid touching the chrysalis excessively, as oils from your skin can harm the developing butterfly. Monitor the remaining chrysalises closely for any signs of distress. Maintaining a clean, dry environment and proper positioning will help ensure a successful emergence. Always handle chrysalises with care to support the transformation process.
7.3 Handling Butterfly Health Issues
If your newly emerged butterfly appears weak, has crumpled wings, or shows signs of disease, act promptly to ensure its well-being. Isolate the affected butterfly to prevent the spread of illness. Provide a clean, dry environment with fresh air and a sugar-water feeder for nutrition. Avoid handling the butterfly excessively, as this can cause further stress. If the butterfly’s wings are damaged, gently place it in a secure, upright position to allow proper drying; Monitor for signs of improvement and ensure the habitat remains free from contaminants. If health issues persist, consult a professional or seek guidance from the kit’s resources. Proper care and attention can help restore the butterfly’s health for a successful release.
Educational Extensions
Butterfly kits offer a wealth of learning opportunities, fostering STEM exploration and creativity. Engage in crafts, life cycle studies, and hands-on activities that make education fun and interactive.
8.1 Learning Opportunities
Butterfly kits provide a unique opportunity to explore STEM concepts, life cycles, and environmental science. By observing the transformation from caterpillar to butterfly, users gain hands-on experience with biological processes. The kits often include educational guides and posters, offering insights into butterfly anatomy and metamorphosis. This interactive learning tool sparks curiosity and encourages a deeper understanding of nature. It’s an ideal resource for classrooms or home education, fostering critical thinking and scientific observation skills. The process also teaches responsibility and patience, as users care for the delicate creatures. These kits are a perfect way to engage learners of all ages in the wonders of natural science and conservation.
8.2 Fun Activities for Kids
Butterfly kits offer a variety of engaging activities for children, making learning fun and interactive. Kids can enjoy decorating the flower-shaped feeder with stickers or creating origami butterflies. These crafts encourage creativity while teaching about the life cycle. Observing the caterpillar-to-butterfly transformation sparks curiosity and excitement. Interactive guides and posters provide visual learning tools, helping kids understand metamorphosis. Families can also participate in STEM-based games, such as life cycle sequencing or butterfly trivia. These activities foster a sense of accomplishment and wonder, making the experience memorable. The hands-on nature of the kits ensures that kids stay entertained while gaining valuable knowledge about nature and science.
8.3 Crafts and Creative Projects
Crafts and creative projects complement the butterfly kit experience, enhancing learning and fun. Kids can decorate the flower-shaped feeder with stickers, creating a colorful habitat for the butterflies. Additionally, crafting a butterfly tapestry cushion or designing butterfly-themed artwork fosters creativity. The kit often includes materials like sticker sheets and guides, inspiring imaginative projects. Children can also draw or paint the life cycle stages, reinforcing their understanding. These activities make the experience engaging and memorable, blending art with science for a well-rounded educational journey. Encourage kids to express their creativity while exploring the wonders of metamorphosis!