
minolta xg 1 user manual
The Minolta XG 1 is a compact‚ user-friendly 35mm film SLR camera designed for both beginners and experienced photographers‚ offering excellent build quality and durability.
1.1 Overview of the Minolta XG 1 Camera
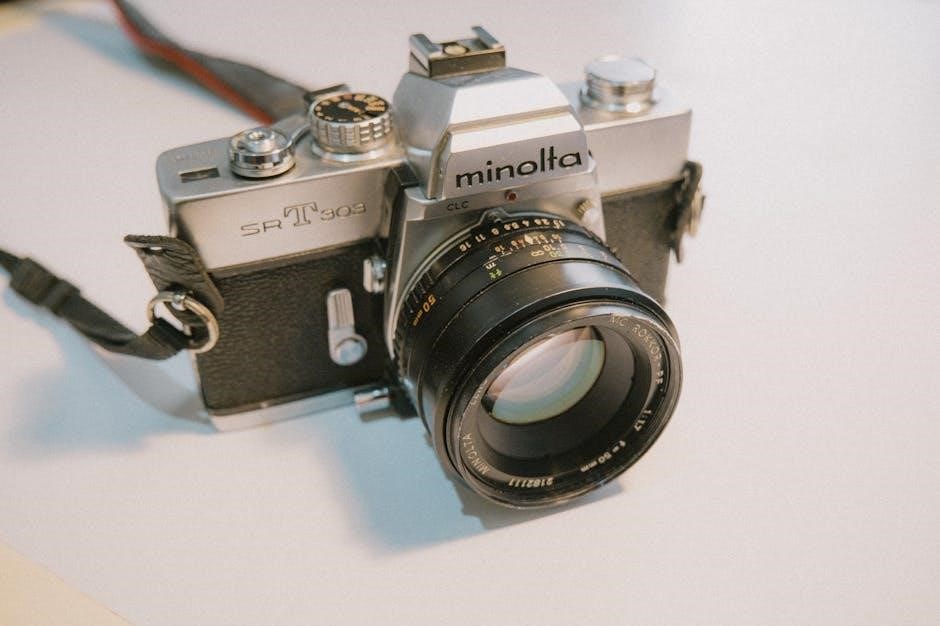
The Minolta XG 1 is a 35mm film SLR camera designed for both amateur and professional photographers. Known for its compact size‚ intuitive controls‚ and robust build quality‚ it offers a user-friendly experience. The camera features a wide range of manual and automatic functions‚ making it versatile for various shooting conditions. Its compatibility with Minolta’s extensive lens system and accessories enhances its versatility. The XG 1 is celebrated for its portability‚ ease of use‚ and durability‚ making it a favorite among photography enthusiasts.
1.2 Importance of the User Manual
The user manual is essential for understanding the Minolta XG 1’s features‚ operation‚ and maintenance. It provides detailed instructions for using modes‚ adjusting settings‚ and troubleshooting common issues. This guide helps photographers of all skill levels unlock the camera’s full potential‚ ensuring optimal performance and preventing errors. By following the manual‚ users can master techniques‚ maintain the camera‚ and extend its lifespan‚ making it an indispensable resource for both beginners and experienced photographers.

Key Features of the Minolta XG 1
The Minolta XG 1 is a compact‚ user-friendly 35mm film SLR camera featuring manual‚ aperture-priority‚ and shutter-priority modes‚ with interchangeable lenses and a built-in flash.
2.1 Lens Compatibility
The Minolta XG 1 is compatible with Minolta’s MD mount lenses‚ offering a wide range of options including standard zoom‚ wide-angle‚ telephoto‚ and macro lenses. This compatibility ensures versatility for various photography needs‚ allowing users to explore different styles and creative possibilities. The MD mount system provides a secure and reliable connection‚ making lens changes quick and easy. This feature-rich design makes the XG 1 adaptable for both casual and professional use.
2.2 Shutter Speed and Aperture Control
The Minolta XG 1 offers precise control over shutter speed and aperture‚ enabling creative management of exposure. Shutter speeds range from 1/1000th of a second to 1 second‚ with a Bulb mode for extended exposures. Aperture control allows for adjustments in f-stops‚ ensuring optimal light capture. The camera features an interlock system to prevent incorrect settings‚ making it user-friendly. This dual control system is designed to provide photographers with flexibility and accuracy‚ catering to both casual and professional use.
2.3 Metering System
The Minolta XG 1 features a reliable center-weighted metering system‚ designed to provide accurate exposure readings. This system measures light from the entire frame‚ with emphasis on the central area‚ ensuring balanced exposures. It operates in both manual and aperture priority modes‚ offering flexibility for various lighting conditions. The metering system is powered by a mercury battery‚ providing consistent performance. This feature enhances the camera’s usability‚ making it suitable for photographers seeking precise control over their shots while maintaining ease of operation.
2.4 Flash Photography Capabilities
The Minolta XG 1 supports flash photography through its built-in flash unit‚ offering versatile lighting options. The flash automatically pops up and fires in low-light conditions‚ providing balanced illumination. It also supports external flash units via the hot shoe‚ enabling advanced lighting setups. The camera features a flash sync speed of 1/60th of a second‚ ensuring sharp images. This capability makes the XG 1 ideal for capturing well-lit photos in various environments‚ from indoor events to outdoor portraits‚ with ease and precision.
Camera Components and Accessories
The Minolta XG 1 includes essential components like the lens‚ viewfinder‚ and control dials. Accessories such as additional lenses‚ tripods‚ and camera bags enhance functionality and protection.
3.1 External Components of the Minolta XG 1
The Minolta XG 1 features a mode dial‚ shutter release button‚ and aperture ring for easy control. The lens mount ensures compatibility with various lenses‚ while the viewfinder and LCD panel provide essential shooting information. Additional components include the film advance lever‚ rewind crank‚ and a tripod socket for stability. These external elements are designed for intuitive operation‚ making the camera user-friendly and efficient for photographers of all skill levels.
3.2 Essential Accessories for the Camera
Essential accessories for the Minolta XG 1 include high-quality lenses‚ a sturdy tripod for stability‚ and filters to enhance image quality. A remote shutter release prevents camera shake‚ while extra batteries ensure uninterrupted use. A protective camera bag is recommended for safe storage and transport. These accessories complement the camera’s functionality‚ allowing photographers to explore creative possibilities and maintain optimal performance in various shooting conditions.
Getting Started with the Minolta XG 1
Unpack and inspect the camera‚ ensuring all components are included and in good condition. Familiarize yourself with the controls and prepare for your first shoot with ease.
4.1 Unpacking and Initial Inspection
Begin by carefully opening the camera box and inspecting its contents. Ensure the Minolta XG 1 body‚ lens‚ viewfinder‚ neck strap‚ and user manual are included. Check for any visible damage or defects on the camera body‚ lens‚ or accessories. Verify that all components are in proper working condition. This step ensures that your camera is ready for use and helps prevent potential issues during operation. Take note of any missing or damaged items and contact the supplier if necessary.
4.2 Checking the Camera Contents
After unpacking‚ verify the Minolta XG 1 contents to ensure all items are included and undamaged. The package typically includes the camera body‚ interchangeable lens‚ viewfinder‚ neck strap‚ and user manual. Check for any signs of wear or damage on the camera body‚ lens‚ or accessories. Ensure the manual is present for guidance on camera operation. This step helps confirm that your equipment is complete and ready for use‚ preventing potential issues during setup or photography sessions.
4.3 Mounting the Lens
To mount the lens on the Minolta XG 1‚ align the red dot on the lens with the red dot on the camera body. Gently twist the lens clockwise until it clicks into place. Ensure the lens is securely attached to avoid any movement during use. Handle the lens by the edges to prevent smudging the glass. Avoid touching the camera’s mirror or internal components to maintain optimal performance and image quality. Proper mounting ensures precise focus and sharp images.
4.4 Loading Film
Open the camera back by pulling the film rewind knob. Insert the film cartridge‚ ensuring it aligns with the spool. Gently pull the film leader to the take-up spool‚ aligning the perforations. Advance the film by turning the rewind knob until it stops. Close the camera back and set the ISO on the lens or camera body. Ensure the film is securely loaded to prevent any issues during shooting. Handle the film by the edges to avoid smudging. Proper loading ensures accurate frame advancement and consistent exposures.

Shooting Modes and Functions
The Minolta XG 1 offers Manual‚ Aperture Priority‚ and Shutter Priority modes‚ providing flexibility for photographers to control exposure settings according to their creative preferences and skill levels.
5.1 Manual Mode
Manual Mode on the Minolta XG 1 offers full control over aperture and shutter speed‚ allowing photographers to customize exposure settings for creative results. Ideal for experienced users‚ this mode enables precise adjustments to capture specific effects. By setting the mode dial to “M‚” users can independently adjust aperture and shutter speed‚ with the camera’s built-in light meter providing guidance. This mode is perfect for mastering exposure techniques and achieving desired artistic outcomes in various lighting conditions.
5.2 Aperture Priority Mode
Aperture Priority Mode on the Minolta XG 1 allows users to set the desired aperture‚ while the camera automatically adjusts the shutter speed for optimal exposure. This mode is ideal for controlling depth of field‚ enabling photographers to isolate subjects or ensure sharpness across the frame. By turning the mode dial to “A‚” users can focus on creative decisions like aperture selection‚ while the camera handles the technical aspects of exposure‚ making it a versatile option for various lighting conditions and compositional needs.
5.3 Shutter Priority Mode
Shutter Priority Mode on the Minolta XG 1 enables photographers to set a specific shutter speed‚ with the camera automatically adjusting the aperture for proper exposure. This mode is perfect for capturing motion‚ whether freezing fast-moving subjects or creating artistic blur. By selecting the desired shutter speed‚ users gain control over the camera’s ability to convey movement and sharpness‚ making it ideal for sports‚ action‚ or creative photography where motion plays a key role in the composition.
Focusing and Depth of Field
Focusing ensures sharp subject capture‚ while depth of field controls the focus area. The Minolta XG 1 offers precise manual focusing and depth of field preview functionality.
6.1 Manual Focusing Techniques
Manual focusing on the Minolta XG 1 is achieved using the lens focus ring. Rotate the ring until the subject appears sharp in the viewfinder. Use the split-image microprism for precise focus. Ensure the subject is well-lit for easier focusing. For moving subjects‚ pre-focus on the expected position. Use the distance scale on the lens for zone focusing. Always check focus accuracy before shooting‚ especially in low-light conditions. Proper technique ensures sharp images every time.
6.2 Understanding Depth of Field
Depth of field (DoF) determines the area in focus within an image. On the Minolta XG 1‚ DoF is controlled by aperture‚ lens focal length‚ and subject distance. A larger aperture (smaller f-stop) creates a shallower DoF‚ blurring the background‚ while a smaller aperture increases DoF‚ keeping more of the image sharp. Use aperture priority mode to experiment with DoF for creative effects‚ such as isolating subjects in portraits or ensuring sharpness in landscapes. Proper DoF control enhances composition and visual storytelling in photography.

Exposure Control
Exposure control on the Minolta XG 1 balances aperture‚ shutter speed‚ and ISO to achieve optimal light intake‚ ensuring properly lit images with creative flexibility for various lighting conditions.
7.1 Aperture Settings
The Minolta XG 1 allows precise control over aperture settings‚ which regulate the amount of light entering the lens. Aperture is measured in f-stops‚ with lower values (e.g.‚ f/1.4) opening the lens wider for more light and shallower depth of field‚ while higher values (e.g.‚ f/16) reduce light intake and increase depth of field. Adjusting aperture enables creative control over image composition‚ balancing background blur and sharpness according to the scene’s requirements.
7.2 Shutter Speed Settings
The Minolta XG 1 offers a range of shutter speed settings‚ from 1/1000th of a second to 1 second‚ plus a Bulb mode for extended exposures. Shutter speed controls the duration the camera’s shutter remains open‚ influencing motion capture and light exposure. Faster speeds freeze action‚ while slower speeds create artistic blur. Adjustments are made using the shutter speed dial‚ allowing photographers to balance creative vision with technical precision for optimal results in various lighting conditions and subjects.
7.3 ISO Settings
The Minolta XG 1 allows photographers to adjust ISO settings‚ which determine the film’s sensitivity to light. Common ISO ranges for film include 100 to 1600‚ with lower values suited for bright conditions and higher values for low-light environments. Adjusting the ISO requires changing the film roll‚ as the camera does not digitally alter sensitivity. Proper ISO selection balances image quality and grain‚ ensuring optimal results in various lighting scenarios while maintaining creative control over the final output.

Metering Modes
The Minolta XG 1 features Center-Weighted and Spot Metering modes. Center-Weighted provides an average reading‚ favoring the center‚ while Spot Metering measures light from a specific area for precise exposure control.
8.1 Center-Weighted Metering
Center-Weighted Metering on the Minolta XG 1 measures light across the entire frame‚ with emphasis on the central area. This mode is ideal for average lighting conditions and provides consistent results. It’s particularly useful for portraits or when the subject is centered‚ as it prioritizes exposure for the middle of the frame. The camera calculates an average brightness‚ ensuring balanced exposure. For precise control‚ users can adjust exposure compensation to fine-tune results‚ making it a versatile option for various shooting scenarios;
8.2 Spot Metering
Spot Metering on the Minolta XG 1 allows precise light measurement from a specific area‚ typically the center of the frame. This mode is ideal for high-contrast scenes or when the subject’s exposure is critical. By focusing on a small spot‚ it helps capture accurate detail in bright or dark areas. Users can adjust exposure compensation for fine-tuned results. Spot Metering is particularly useful for backlit subjects or when the main subject is off-center‚ ensuring optimal exposure for the desired area.
Flash Photography
The Minolta XG 1 features a built-in flash for convenient low-light photography‚ offering red-eye reduction and bounce capabilities. It also supports external flash units for enhanced lighting control.
9.1 Built-in Flash
The Minolta XG 1 features a convenient built-in flash with a guide number of 12 (ISO 100/m). It includes red-eye reduction and bounce flash capabilities for more natural lighting. The flash automatically elevates and fires in low-light conditions‚ with manual intensity adjustment available. A test flash function ensures proper synchronization. The built-in flash also supports the camera’s auto power zoom feature‚ making it versatile for various shooting scenarios. It’s an ideal solution for casual and professional photographers seeking ease and flexibility in flash photography.
9.2 External Flash Units
The Minolta XG 1 supports external flash units‚ such as the Minolta 101 or 102‚ for enhanced lighting control. These units offer greater power and flexibility than the built-in flash. They integrate seamlessly with the camera’s TTL metering system‚ ensuring accurate exposure. External flashes are ideal for reducing red-eye and improving illumination in low-light conditions. The Auto Power Zoom feature adjusts flash coverage based on the lens focal length. For optimal results‚ users should consult the manual for compatible models and settings.
Maintenance and Care
Regularly clean the camera with a soft cloth‚ avoiding harsh chemicals. Store in a dry place to prevent moisture damage. Check for dust and use a lens brush as needed.
10.1 Cleaning the Camera
Use a soft‚ dry cloth to wipe the camera body and external components. Avoid harsh chemicals or abrasive materials. For the lens‚ gently clean with a microfiber cloth and lens cleaning solution. Remove dust from crevices using a small‚ dry brush. Regular cleaning prevents damage and ensures optimal performance. Avoid touching the lens surface to prevent smudges. Store cleaning supplies in a dry place to maintain their effectiveness. Clean the viewfinder with a soft cloth to ensure clear visibility. Always handle the camera with care to avoid scratches or damage.
10.2 Storing the Camera
Store the Minolta XG 1 in a cool‚ dry place to prevent moisture damage. Use a protective case or pouch to shield it from dust and scratches. Avoid extreme temperatures and direct sunlight‚ which can harm the camera’s electronics. Place silica gel packets in the storage area to maintain humidity control. Remove batteries before long-term storage to prevent corrosion. Keep the lens cap on to protect the lens from dust. Ensure the camera is clean and dry before storing to maintain its condition and longevity.
Troubleshooting Common Issues
Identify and resolve common problems like shutter malfunctions‚ metering inaccuracies‚ or lens compatibility issues by consulting the manual or seeking professional assistance for optimal performance.
11.1 Shutter Malfunction
A shutter malfunction can cause issues like slow or stuck shutter curtains. Check for dirt or debris‚ ensure proper battery power‚ and adjust shutter speeds. If problems persist‚ consult the manual or contact a professional for repair to maintain optimal camera performance and prevent further damage.
11.2 Metering Inaccuracies
Metering inaccuracies can occur due to extreme lighting conditions or reflective surfaces. Check if the lens is clean and properly attached. Ensure the camera is set to the correct metering mode. If issues persist‚ recalibrate the meter or use an external light meter for more accurate readings. Refer to the manual for troubleshooting steps to resolve metering errors and ensure precise exposure control. Regular maintenance can also help maintain metering accuracy over time.
11.3 Lens Compatibility Problems
Lens compatibility issues may arise if using non-native or damaged lenses. Ensure the lens is properly mounted and compatible with the Minolta XG 1. Clean the lens contacts and check for physical damage. If problems persist‚ consult the user manual or contact a professional for assistance. Using incompatible lenses may result in improper function or error messages. Always verify lens compatibility before use to maintain optimal camera performance and avoid potential damage to the equipment.
The Minolta XG 1 is a versatile and durable camera‚ ideal for photographers seeking precision and creativity. Regular maintenance and proper usage ensure optimal performance and longevity.
12.1 Summary of Key Points
The Minolta XG 1 is a versatile 35mm SLR camera designed for both enthusiasts and professionals. It features manual and aperture priority modes‚ a reliable metering system‚ and compatibility with a wide range of lenses. The camera’s durable build and intuitive controls make it ideal for various photography scenarios. Proper maintenance‚ including regular cleaning and storage‚ ensures long-term functionality. By following the user manual‚ photographers can unlock the full potential of the XG 1‚ capturing high-quality images with precision and creativity.
12.2 Final Tips for Using the Minolta XG 1
Always handle the camera with care‚ ensuring lenses and surfaces are clean. Experiment with different modes to master lighting and composition. Regularly check battery levels and film stock. Store the camera in a dry‚ cool place to prevent damage. For optimal results‚ use high-quality film and compatible accessories. Practice manual focusing and depth-of-field techniques to enhance creativity. Keep a tripod handy for low-light shots and consider using a lens hood to reduce glare. Happy shooting!